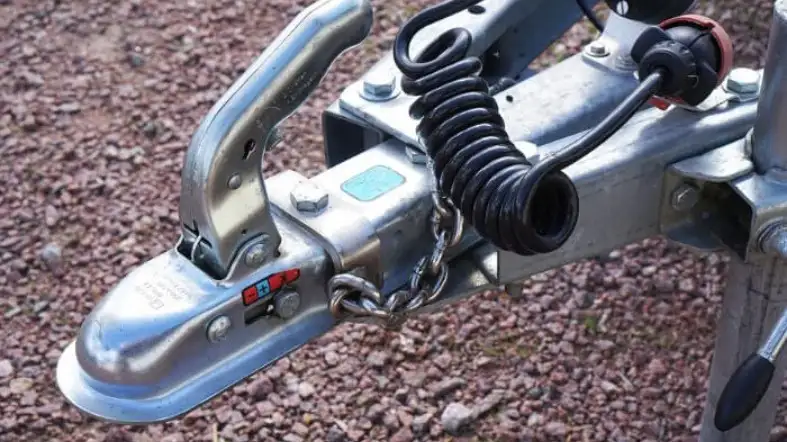
Rattle hitches are a common problem with RVing.
You might not even know that you have one until it’s too late and your items have already started rattling around inside your RV.
A rattling hitch can not only be annoying, but it can also cause damage to your vehicle and trailer.
That’s why we’re such big fans of homemade anti-rattle hitches.
Not only are they relatively easy to make, but they are also very effective at reducing noise and vibration.
In this blog post, we’ll show you how to make your own anti-rattle hitch in just a few simple steps.
What You’ll Need to Make an Anti-Rattle Hitch?
You’ll need:
- 1/2 inch diameter PVC pipe (4 feet long)
- PVC pipe cutter or saw
- PVC glue or epoxy
- 1/2 inch diameter PVC end cap
- Drill
- 1/4 inch diameter drill bit
- Pencil or marker
- Measuring tape
- Sandpaper (optional)
- Spray paint (optional)
How To Make An Homemade Anti-Rattle Hitch
There are several steps to creating an anti-rattle hitch, but the entire process is relatively straightforward.
Here’s what you’ll need to do:
- Measuring and cutting your PVC pipe
- Applying glue
- Drilling holes around the circumference of the pipe
- Sanding down any rough edges or imperfections
- Applying paint
- Inserting into your trailer hitch receiver and securing
1. Measuring And Cutting Your PVC Pipe
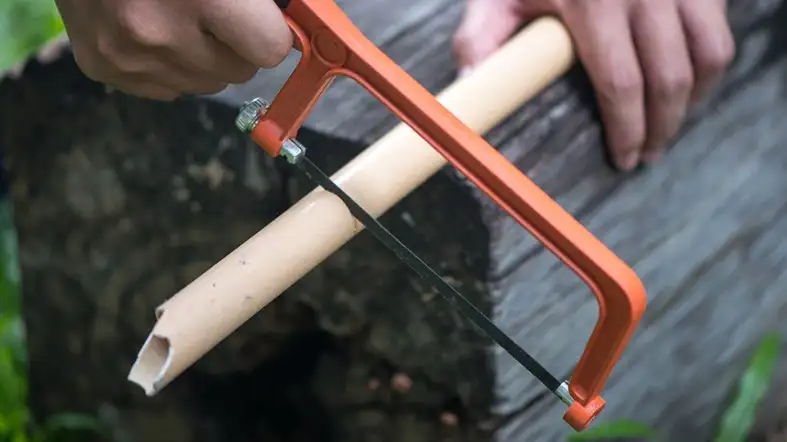
Start by measuring and cutting your PVC pipe to the desired length using a PVC cutter or saw.
The size and length of your anti-rattle hitch will depend on the specific application and whether you want it to extend all the way out from your trailer hitch receiver, or be mounted closer toward the back of your vehicle.
In general, we recommend starting with a 4 foot piece of PVC pipe for most applications.
2. Applying glue
Next, glue one end of the PVC pipe into the end cap using PVC glue or epoxy.
Work quickly and carefully when applying adhesive to ensure that it does not seep out of any open ends in your pipes.
Allow the glue to dry completely before moving on to the next step.
3. Drilling Holes Around The Circumference Of The Pipe
Once your end cap is securely attached to one end of the PVC pipe, use a drill and 1/4 inch drill bit to create several small holes around the circumference of the pipe.
These holes should be spaced evenly apart and roughly 1-2 inches from each other.
Don’t worry if you accidentally make too many or too few holes – you can always add or remove more as needed until your anti-rattle hitch feels just right in your trailer hitch receiver.
4. Sanding Down Any Rough Edges Or Imperfections
If needed, you can use some sandpaper to smooth out any rough edges or imperfections on your PVC pipe.
If desired, you can also spray paint your anti-rattle hitch to give it a more polished look.
5. Applying paint
Optionally, you can also apply a coat of spray paint to your anti-rattle hitch for a more polished look.
If desired, wait until the final step before adding any paint so that you can make sure it fits and works properly in your trailer hitch receiver.
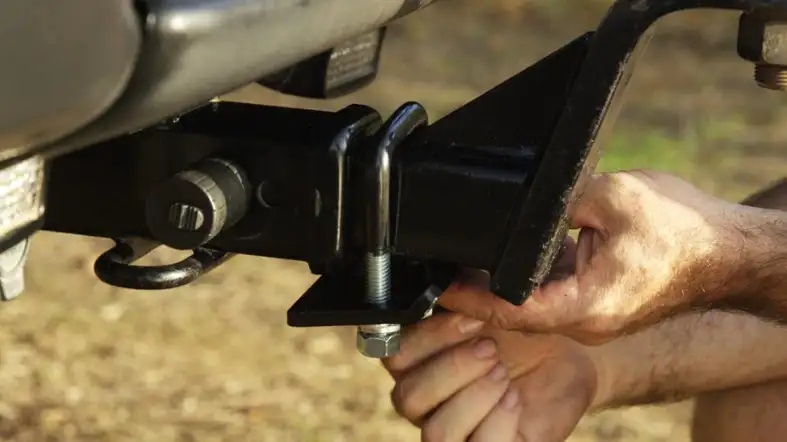
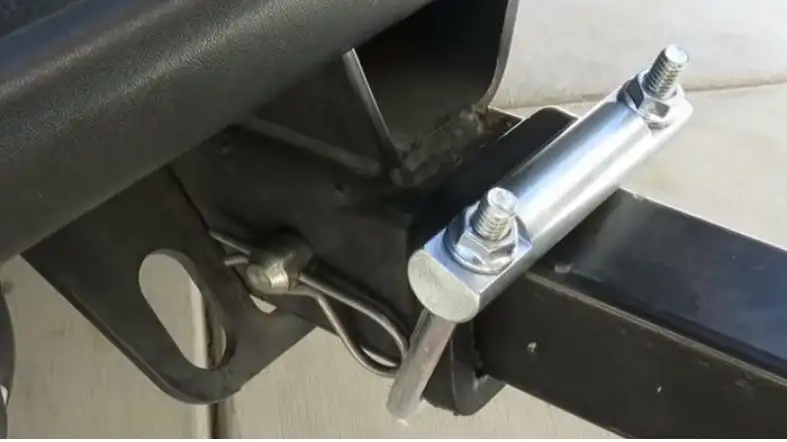
6. Inserting into your trailer hitch receiver and securing
Finally, slide your finished anti-rattle hitch into your trailer hitch receiver and use appropriate hardware (bolts, screws, etc.) to secure it in place.
Then test it out on the road and see how well it prevents noise and vibration from rattling around inside your RV!
6 Reasons Why You Should Make Your Own Anti-Rattle Hitch:
1. It’s Cheaper
One of the primary reasons to make your own anti-rattle hitch is that it’s cheaper than buying one.
A typical anti-rattle hitch can cost anywhere from $30 to $50, while the materials to make your own will only cost a fraction of that.
Additionally, you’ll likely have most of the necessary tools and supplies on hand, which will further reduce the cost.
2. It’s Faster and Easier Than You Think
Another reason to make your own anti-rattle hitch is that it’s faster and easier than you might think.
The entire process can be completed in an afternoon and requires only basic tools and supplies that are readily available.
3. You Can Customize It to Your Needs
When you make your own anti-rattle hitch, you can customize it to your specific needs and preferences.
For example, you can choose the size, shape, and material of your hitch based on the type of vehicle you have and the way you use it.
If you frequently tow large trailers or RVs, you can make a sturdier hitch that can better handle the weight and stress.
Conversely, if you only occasionally tow small trailers, you can make a lighter-duty hitch that’s easier to store and transport.
4. No Special Tools Are Required
Another benefit of making your own anti-rattle hitch is that you likely won’t need any special tools to do it.
If you have a drill and some basic hand tools, you should be able to make your hitch without any problems.
However, if you don’t have access to a drill, you can likely borrow one from a friend or neighbor.
5. You Can Be Sure of the Quality
When you make your own anti-rattle hitch, you can be sure of the quality since you’re in control of every aspect of the process.
This is in contrast to buying a hitch, where you have no way of knowing how well it was made or what materials were used.
By making your own hitch, you can be confident that it will be strong and durable enough to stand up to whatever you throw at it.
6. It’s Satisfying
Finally, one of the best reasons to make your own anti-rattle hitch is simply because it’s satisfying.
There’s something satisfying about being able to say “I made this” when someone asks about your hitch.
Additionally, making your own hitch gives you a sense of pride and accomplishment that comes with knowing you built something yourself.
The Pros And Cons Of Making Your Own Anti-Rattle Hitch:
Overall, there are a number of pros to making your own anti-rattle hitch.
These include the fact that it’s cheaper, faster, and easier than you might think, as well as the ability to customize it to your specific needs and preferences.
In addition, making your own hitch gives you a sense of satisfaction and accomplishment that comes from being able to say “I made this” when asked about it.
However, there are also some potential drawbacks to making your own anti-rattle hitch.
For example, it can take some time and effort to find the right materials and tools, and you may run into challenges while trying to make your hitch exactly how you want it.
Additionally, it may be difficult to ensure the quality and durability of your hitch without prior experience in this area.
FAQs on how to make an anti-rattle hitch
How Do I Store My Homemade Anti-Rattle Hitch?
There are a few different ways to store your homemade anti-rattle hitch, depending on the size and shape of your vehicle.
For example, you can keep it in a garage or shed, or you can attach it to the outside of your car using bungee cords or other strapping mechanisms.
You may also want to consider investing in a quality protective cover that will help keep the hitch safe from damage when not in use.
How Do I Know If My Homemade Anti-Rattle Hitch Is Strong Enough To Support My Vehicle?
There are several things you can do in order to ensure that your homemade anti-rattle hitch is strong enough to support your vehicle.
One option is to consult with a trusted mechanic or auto expert who can provide you with advice and suggestions based on your specific needs and preferences.
You may also want to test the strength of the hitch by attaching it to a heavy load, such as an RV or large trailer, and seeing how well it holds up.
How do I attach the rubber or foam to the metal or plastic?
You can use an adhesive such as silicone or double-sided tape to attach the rubber or foam to the metal or plastic.
Make sure to apply the adhesive evenly to ensure a secure hold.
Conclusion
Now you know how to make an anti-rattle hitch, as well as the pros and cons of doing so.
Ultimately, whether or not you decide to make your own anti-rattle hitch is up to you and will depend on your specific needs and preferences.
However, if you’re looking for a reliable way to tow your vehicles without spending too much money or time, then making your own anti-rattle hitch is an option worth considering.