Have you ever wondered how your trailer hitch coupler works?
It’s actually a pretty simple mechanism.
But it’s important to know how it works in order to use it properly and avoid damage.
In this blog post, we’ll take a closer look at the trailer hitch coupler and explain how it works.
How Does A Trailer Hitch Coupler Work?
A trailer hitch coupler links your trailer to your vehicle. It fits on your tow vehicle’s hitch ball. It needs to match the hitch ball in size and weight capacity.
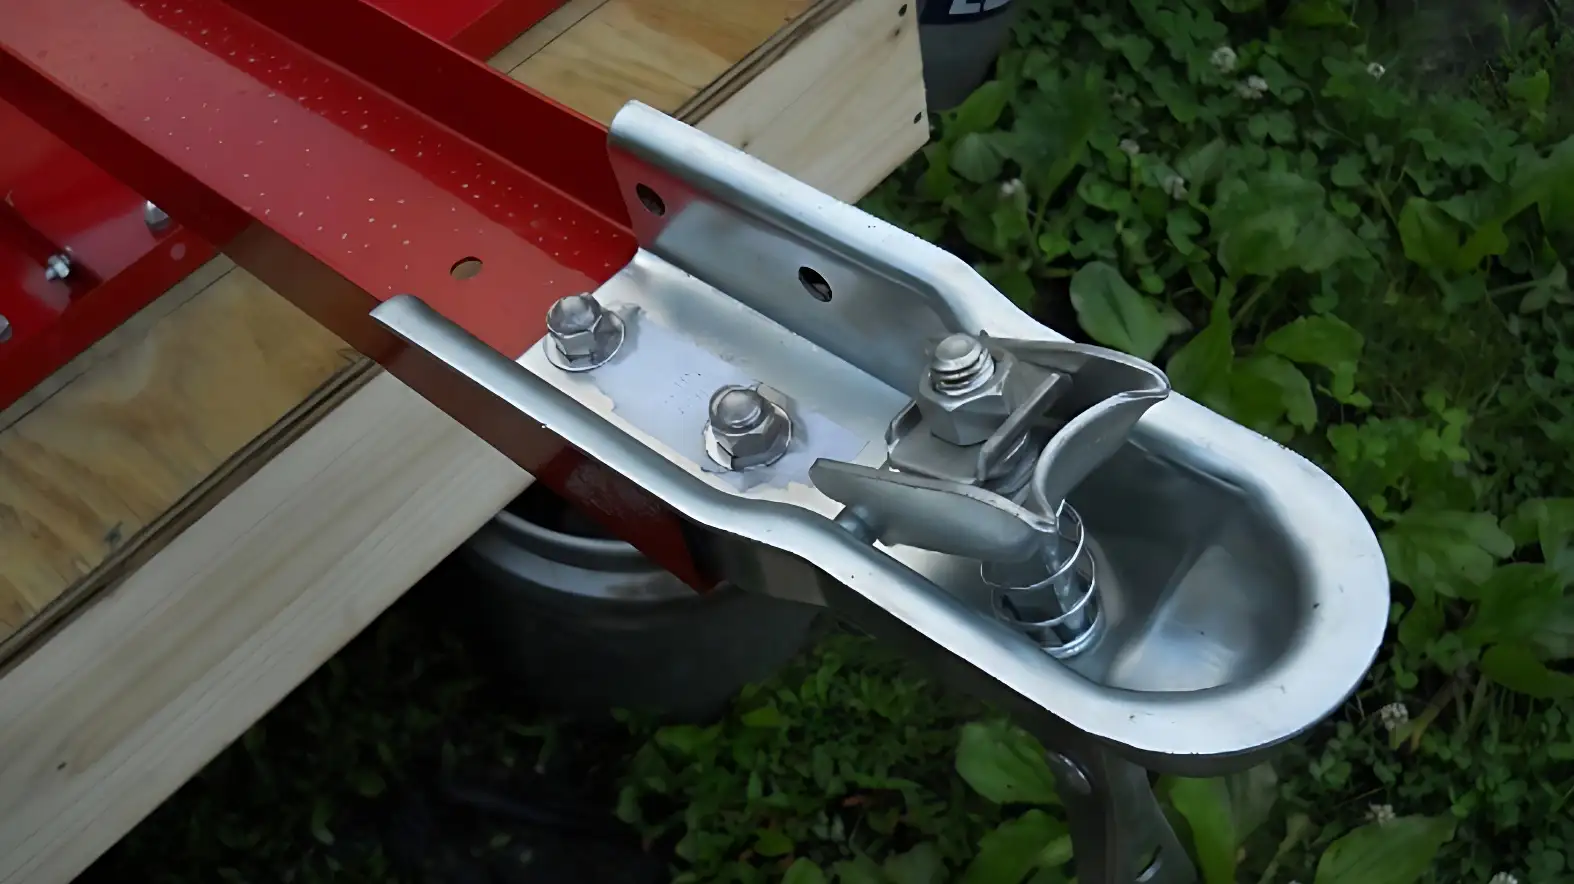
A trailer coupler works by securely attaching to the hitch ball. When you flip the coupler’s lever, it pulls the clamp tight under the ball, ensuring a firm connection.
Proper installation is critical for safety and preventing damage to your trailer unit. Let’s explore functionality in-depth below:
The Basic Coupler Mechanism
The trailer hitch coupler fits over the tow vehicle’s hitch ball. It then pivots on it. I must stress that the coupler should be the same size as the hitch ball. It should also have the same or greater weight capacity. This makes sure your trailer stays securely connected.
Specialized Couplers
Certain couplers are for specific tasks. A gooseneck coupler fits over a gooseneck hitch ball. You can mount couplers with lunette rings on your trailer. These connect to a tow vehicle’s pintle hitch mount. This is ideal for heavy-duty towing.
Articulating Couplers
The Lock N Roll is a fully articulating coupler. Many people who travel over land prefer it. This type of coupler allows for motion in three axes. That’s perfect for off-road use!
Brake Actuator Couplers
Brake actuator couplers activate your hydraulic trailer brakes. This happens when you apply the brakes in your tow vehicle. Such couplers are an excellent choice for safety.
Coupler Configurations
Trailer couplers come in many setups. All work by clamping around the hitch ball. Some use a hand wheel to tighten the clamp to the ball. Others have a lever or toggle for locking the coupler.
The Locking Mechanism
When you flip the lever to the locked position, the clamp secures against the underside of the hitch ball. Adjusting this correctly is key for safe operation. So, there’s an adjusting nut on the toggle bolt. The fit should be snug, not binding. If it’s too loose, the coupler may disconnect from the hitch ball. That’s a safety hazard you must avoid!
Types Of Hitch Coupler
Straight Tongue/Channel Style
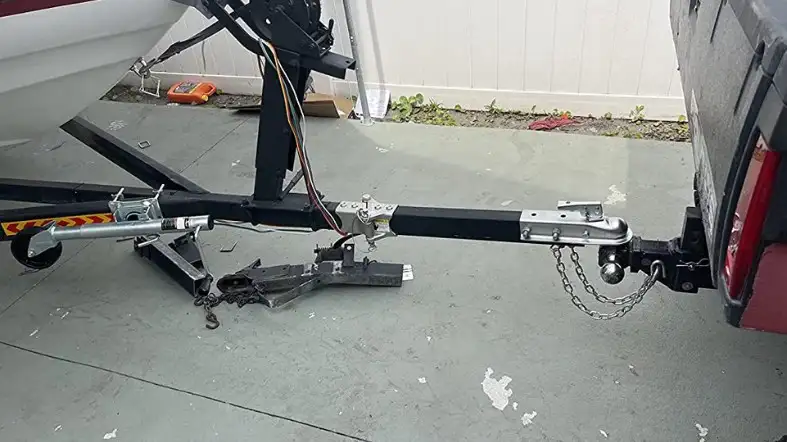
If you’re looking for a versatile and easy-to-use hitch coupler, the straight tongue/channel style is a great option.
This style of hitch coupler consists of a square tubular mounting sleeve that fits over the trailer’s A-frame, with a straight channel tongue that extends out from the sleeve.
The tongue can be either welded or bolted to the frame and usually has a pitch adjustment plate to ensure that it’s level with the trailer.
This type of hitch coupler is quick and easy to use and is compatible with most standard trailers.
Plus, it’s relatively inexpensive, making it a great choice for budget-conscious shoppers.
Whether you’re looking to tow a small trailer or a large one, the straight tongue/channel style hitch coupler is a great option.
Round Tongue
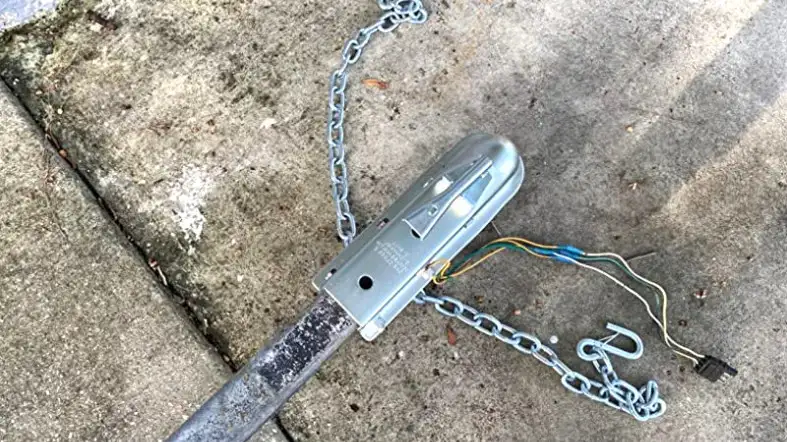
Round tongue/channel style hitch couplers are the most common type of coupler found on trailers today.
They feature a round shank tongue that fits into a corresponding round opening on the trailer ball.
A spring-loaded collar helps to keep the tongue in place, and a pin or latch secures the coupler to the trailer.
This type of coupler is very easy to use, and it is highly versatile, making it an excellent choice for a wide variety of trailers.
However, it is important to note that round tongue/channel style hitch couplers are not compatible with certain types of trailer balls.
Make sure to check compatibility before making your purchase.
A-frame
A-frame solid stamped steel couplers are the most popular type of hitch for RVs and trailers.
They offer a solid connection between the towing vehicle and the trailer, and they’re easy to use.
A-frame couplers are designed to fit onto the A-frame of the RV or trailer, and they’re typically secured with a pin or clip.
Some A-frame couplers also feature a built-in latching system, which helps to prevent accidental disconnection.
While A-frame couplers are very popular, they’re not perfect.
One potential downside is that it can be difficult to line up with the receiver on the tow vehicle.
In addition, they’re not typically compatible with aftermarket hitches, so it’s important to make sure that your RV or trailer has an A-frame coupling before choosing this type of hitch.
Gooseneck
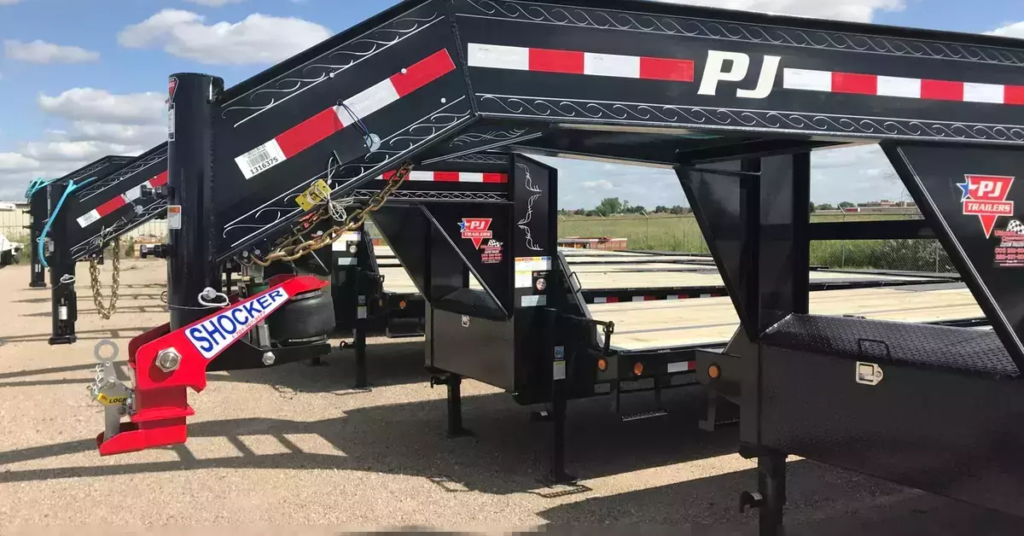
The gooseneck hitch is a long tubular shaft coupler that is typically used to connect a horse trailer to a tow vehicle.
It is named for its goose neck-like shape, and it is one of the most popular types of hitches used today.
Gooseneck hitches are designed to provide a tight connection between the tow vehicle and the trailer, and they can be easily installed and removed by one person.
Because of their design, gooseneck hitches are also able to provide a smoother ride than other types of hitches.
As a result, they are an excellent choice for those who frequently tow a horse trailer.
Adjustable Couplers
Adjustable couplers are one type of hitch coupler that can be used with a trailer.
They led directly to the frame and offer the flexibility of using different size balls for towing.
The most common ball sizes are 1 7/8″, 2″, and 2 5/16″. When using an adjustable coupler, it is important to know the maximum tongue weight and gross trailer weight rating for your vehicle.
This information can be found in your vehicle’s owner’s manual or from the manufacturer.
Another advantage of adjustable couplers is that they allow you to level your trailer, which can improve towing stability and help prevent sway.
If you are looking for a hitch coupler that offers versatility and convenience, then an adjustable coupler may be the right choice for you.
How Do You Install A Coupler On A Trailer Hitch?
It is very important to install a coupler on a trailer hitch correctly, as this will ensure that your vehicle is safe from damage.
Below we have provided some steps to help you with the installation process.
Step 1: Position Your Trailer
First, you will need to position your trailer so that the coupler is at a height that you can easily reach.
If your trailer does not have a built-in jack, then you will need to use a bottle jack or a similar device to raise it up to this level.
Step 2: Pre-Install the Pin and Clip
When installing a trailer hitch coupler, it is important to first pre-install the pin and clip.
This step helps ensure that the coupler will fit securely onto your vehicle’s receiver hitch.
It’s time to pre-install the pin and clip, you will need to first place the coupler over the receiver hitch on your vehicle and rotate it until it is lined up with the hole in the receiver.
Next, insert the pin through the hole in the coupler and into the receiver hitch. Finally, secure the pin by sliding on the clip and locking it into place.
Step 3: Raise the Coupler
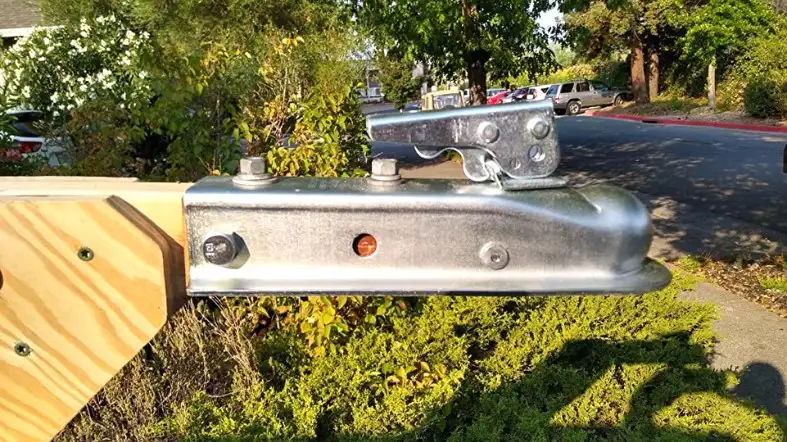
At this point, you should raise the coupler so that it is securely attached to your trailer hitch.
Start by attaching one of the two safety chains to a stationary portion of your car or truck, such as the frame or a bumper attachment point.
Then, carefully lift the coupler and slide it into place over the ball on your vehicle’s hitch.
Make sure that the ball and coupler are aligned with one another, and then gently lower the coupler into position over the ball.
Finally, use your hand to tighten the large locking nut on top of the coupler until it is securely fastened in place.
Step 4: Align the Ball and Coupler
The ball and coupler are the two main parts of a trailer hitch.
The ball is a round metal piece that attaches to the receiver on your vehicle, while the coupler is a square or U-shaped piece that connects to your trailer.
To align the ball and coupler properly, you will need to adjust the height of the ball until the coupler is sitting at a slight angle.
This will ensure that the trailer and vehicle are properly connected, preventing any rattling or shaking during towing.
Additionally, you should make sure that the ball is secured tightly to your receiver so that it doesn’t come loose while driving.
Step 5: Tighten the Coupler
When you have finished tightening the coupler, you should test it out.
First, make sure your trailer hitch is completely level.
Then, use a jack to raise the back end of your vehicle so that the tow ball can be connected to your trailer’s tow ball coupler.
Finally, carefully drive forward to see if the trailer hitch and coupler work together well.
If there is any shakiness or movement, go back and double-check that everything is tightened properly.
With a solid connection between your hitch and coupler, you can confidently tow your trailer to your destination.
A properly working trailer hitch and coupler are crucial for any type of trip, whether you’re carrying work cargo or going camping with loved ones.
How Much Higher Should The Hitch Ball Be Than The Coupler?
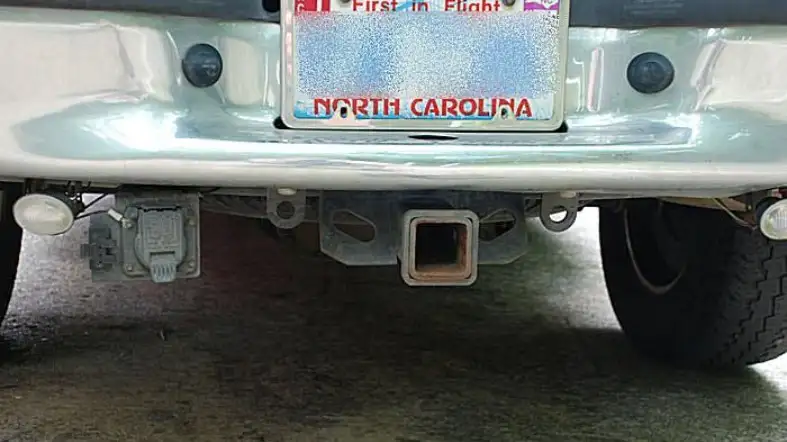
Most experts recommend that the ball be positioned somewhere between 1 inch higher than the coupler.
This ensures that your trailer and vehicle are properly connected while driving, providing optimal stability and control.
In addition, ensuring that the ball and coupler are aligned properly will help prevent any rattling or shaking while towing.
To achieve this level of alignment, you may need to adjust the height of your hitch ball or the angle at which your trailer sits relative to your vehicle.
Overall, it is important to take the time to ensure a tight fit and proper alignment when using a trailer hitch coupler.
As this will not only help to keep you and your vehicle safe while driving but also ensure that your trailer performs at its best.
How Do You Check A Trailer Coupler?
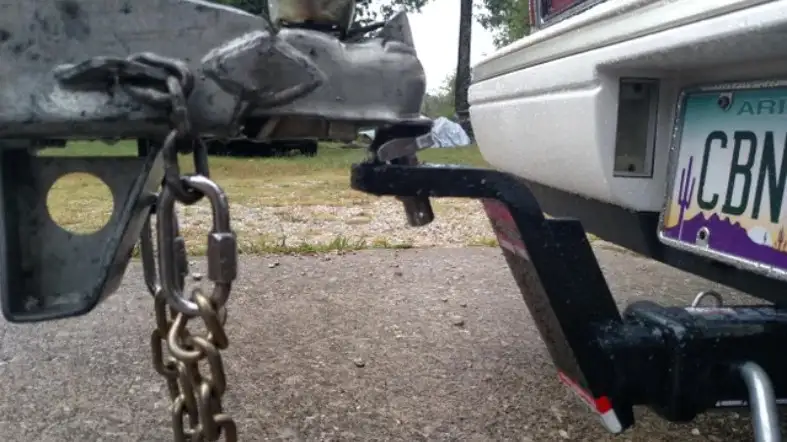
People who own a trailer often wonder how to check their coupler or hitch connection.
The first thing that you need to do is make sure your vehicle is on level ground and not going up or downhill.
Also, try to avoid having any cargo in the back of the bed.
If you have it loaded, unload some of it to allow for better access to the hitch area.
Once you have safely secured your vehicle, you can begin checking your trailer coupler.
Most modern trailers will use a mechanical connection that is powered by an electric motor.
This means that you should check the battery in your trailer and ensure it has enough power to engage and hold the connection securely.
Additionally, you should check the motor for any signs of corrosion or damage.
If everything appears to be in good condition and working properly, you can move on to check the physical connection between your trailer hitch and the coupler itself.
This will involve inspecting the hitch ball and ensuring that it is clean and free from any debris.
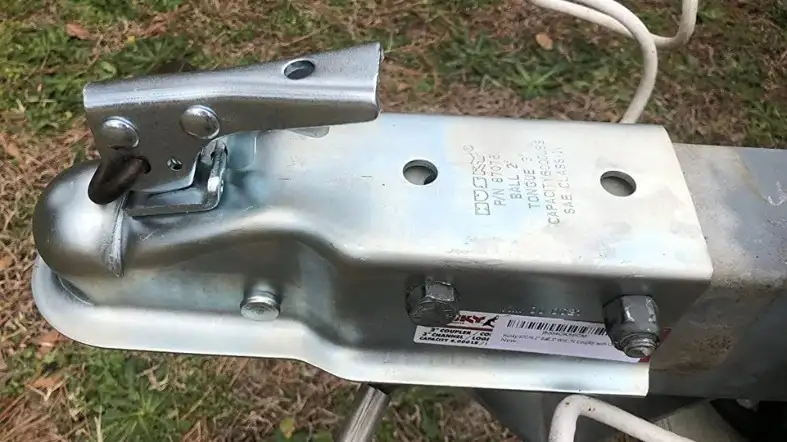
You should also check the coupler ring for any signs of cracks or damage that could affect the integrity of the connection.
If everything looks good, you can proceed with connecting your trailer and driving it to your desired destination.
However, if you notice anything that seems out of the ordinary or suspect there is a problem with your coupler, you should contact a professional to have it inspected and repaired as necessary.
How Tight Should Trailer Coupler?
When it comes to maintaining your trailer coupler, one of the most important things to consider is how tight you should keep this connection.
The connection between the coupler and ball socket should be snug, but remember to not make it too tight where you’re unable to shut the latch.
There are a few different factors that will determine how tightly you should secure your coupler, including the weight and size of your load, the condition of your hitch and coupler, and any road conditions or environmental factors that might affect your trailer.
Generally, it’s a good idea to check your coupler before each trip and make sure that it is tightly secured.
FAQs on how trailer hitch coupler works
Should You Grease A Trailer Coupler?
Yes, it is often a good idea to grease your trailer coupler to help keep it working smoothly.
This can help to reduce wear and tear on the coupler over time, as well as make it easier to connect and disconnect your trailer.
Can I Adjust A Trailer Coupler?
Yes. Depending on your specific trailer, you may be able to adjust the tightness of your coupler yourself.
However, for some trailers, it may be necessary to take it to a professional or trailer repair shop in order to adjust it properly.
Do Trailer Couplers Wear Out?
Yes, trailer couplers can wear out over time. Especially if they are not properly maintained or used frequently.
You should inspect your coupler regularly and replace it if you notice any signs that it is wearing out or damaged.
Conclusion
Now that you know how to properly check and maintain your trailer coupler, you can rest assured that your trailer will be safe and secure on the road.
It is important to regularly check for any damage or wear and to adjust the coupler as necessary.
If you notice anything unusual or suspect there is a problem with your trailer, it is best to seek professional assistance in order to ensure that it is fixed correctly.
With proper care and maintenance, your trailer coupler should last for many years to come.
